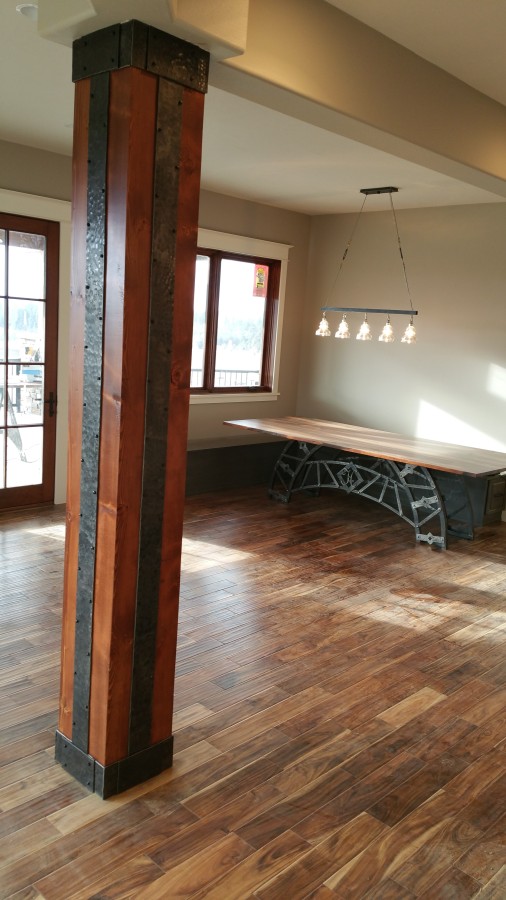
European Arched Bridge Inspired Table Base and Iron Timber Post Trim
- Created:
- 12/15/14
- Materials:
- Iron
- Weight:
- 300 pounds
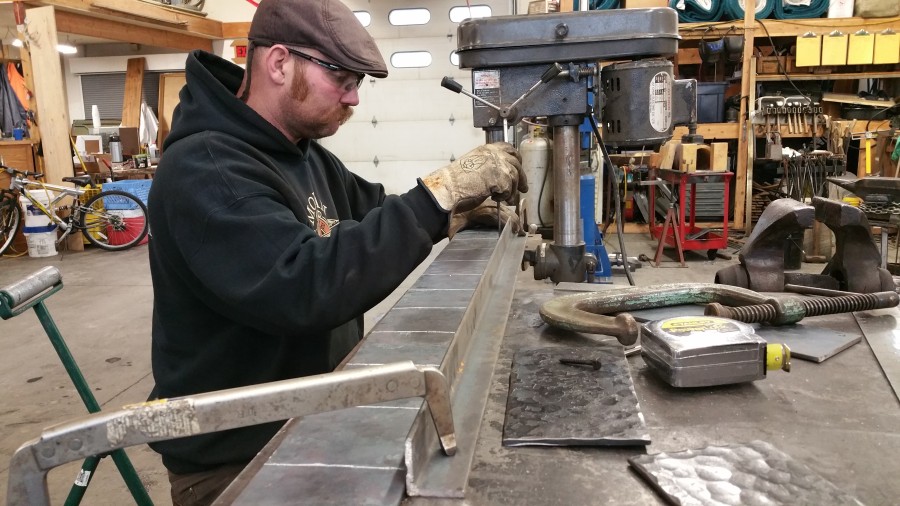
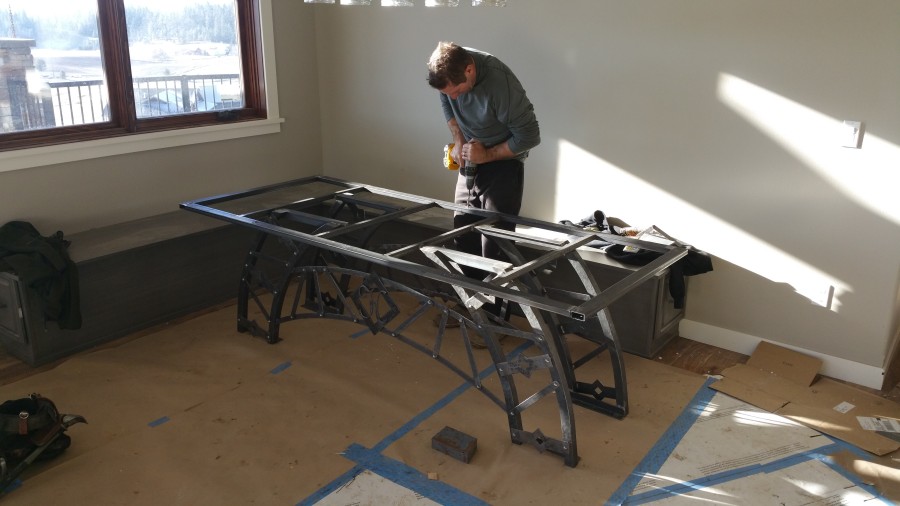
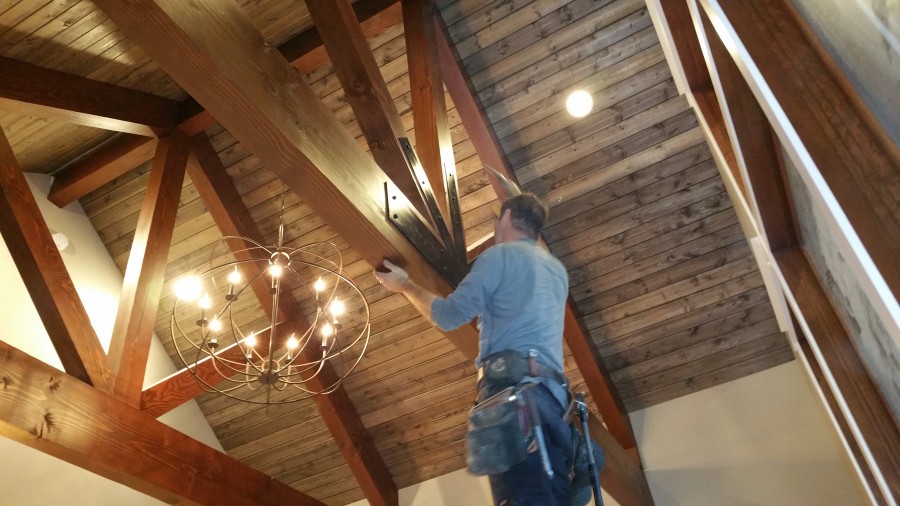
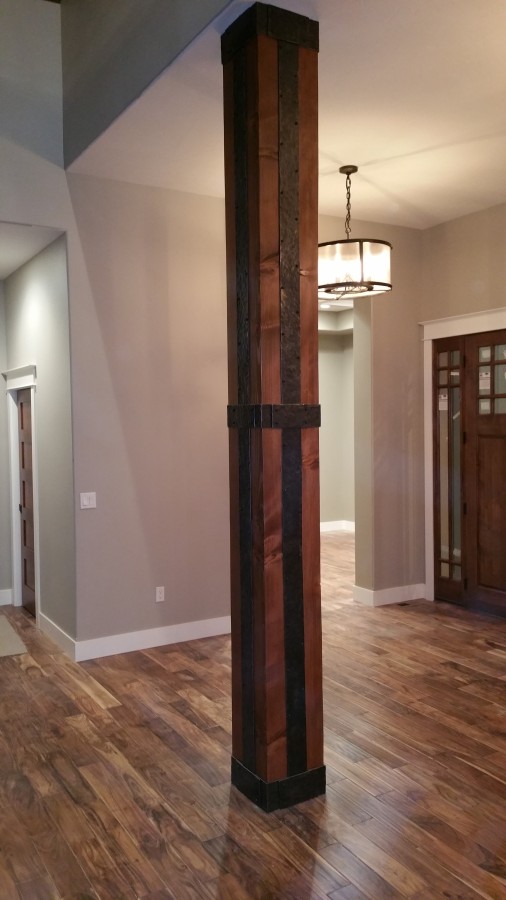
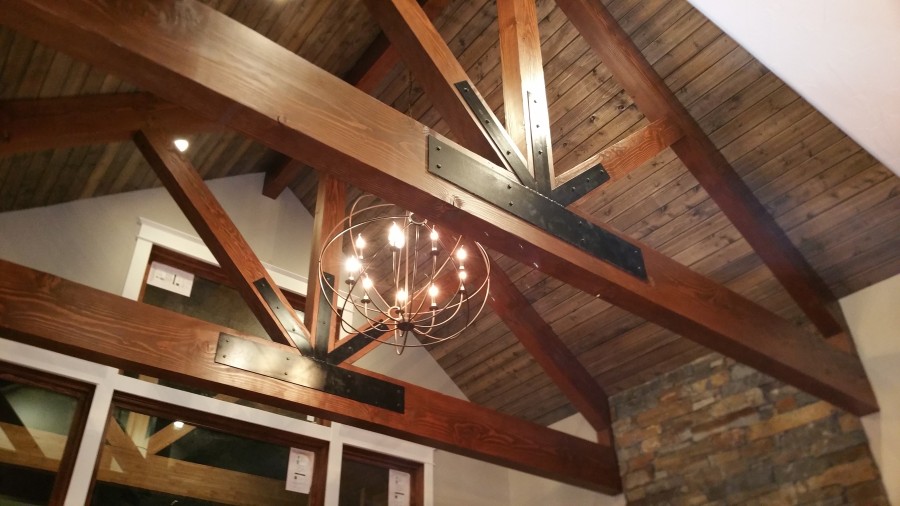
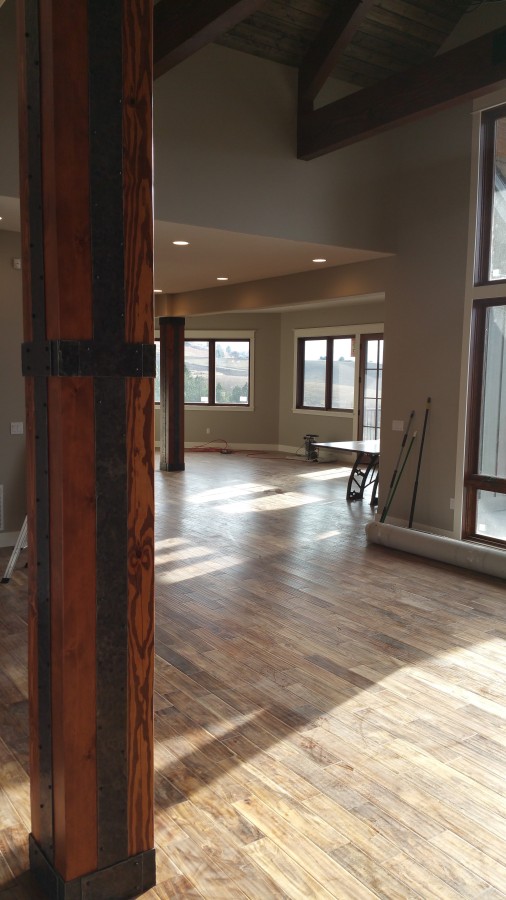
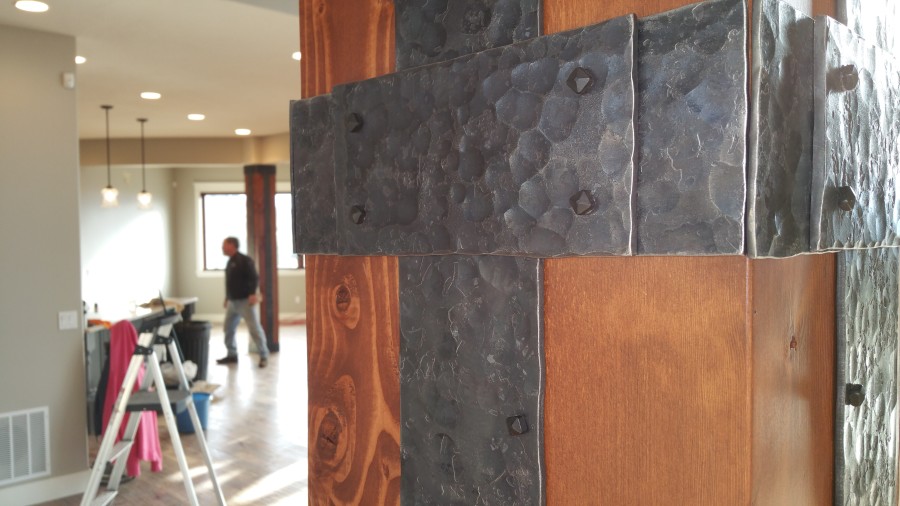
Trim:
The posts were actually 4 6x6 posts placed in a square with each post in one of the four corners. By attaching the vertical trim to 2 posts thus covering the 1.5” gap between them, it gives the appearance of a 12x12 post. The vertical trim is 4” x1/4” iron that has been completely hammer textured and I used 2” x ¼” pyramid square mini lag screws to install the trim. Originally hand forged nails were going to be used but after texturing the iron I realized I was dang near impossible to get it totally flat and ¼” thick piece of iron has enough spring to it to pull the nails out of one end if there is even a little teeter totter action. Being attached to new construction every house settles a bit I wanted to ensure the iron stays put and none of the fasteners back out. The mini lag screws worked fantastic and all the iron is tight to the timber posts.
The vertical trim was run and the horizontal trim wrapping around the posts consisted of 3 pieces per side. 2 pieces butted up to the vertical piece and a 3rd piece went over all three, this covered the gaps between the iron which pushed little humps out when you hammer the corners during texturing, and it added some depth, giving the trim a richer feel and look. The holes in the 2 pieces that butted up were drilled 3x bigger then the actual bore needed for the fastener, this allowed for some adjustment in the pieces so the corners and pieces of iron at each junction would line up properly. I really liked the contrast between the color of the stained post and the iron.
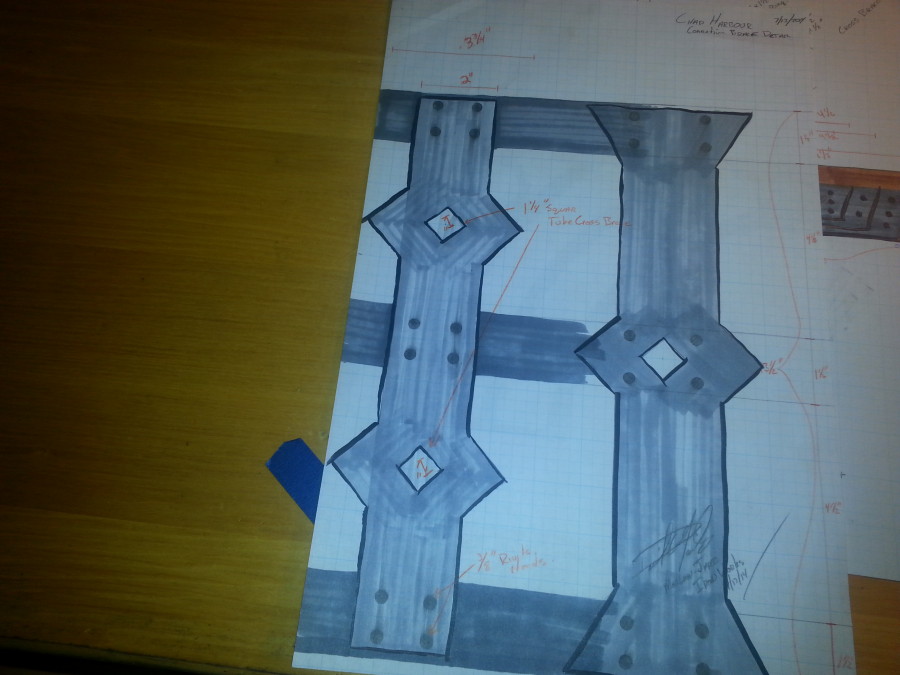
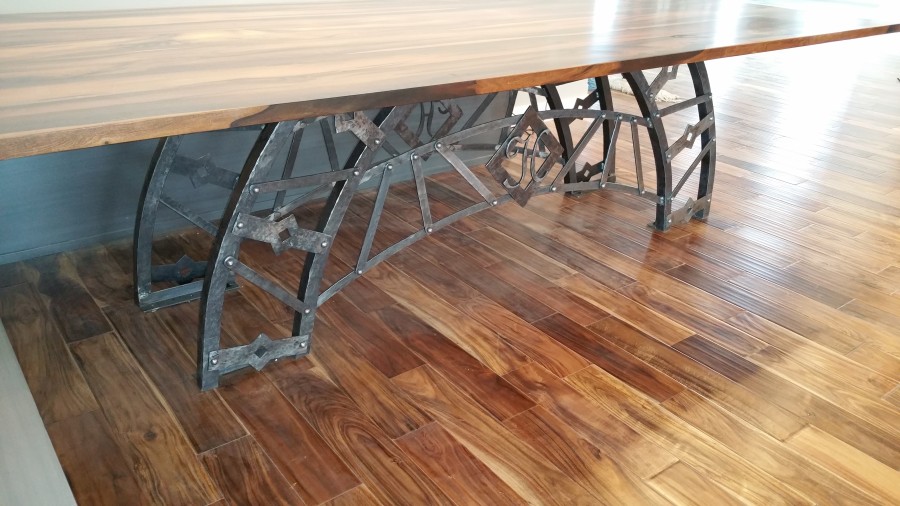
Truss Braces:
They were simple flat iron welded and lag bolted with square head fasteners.
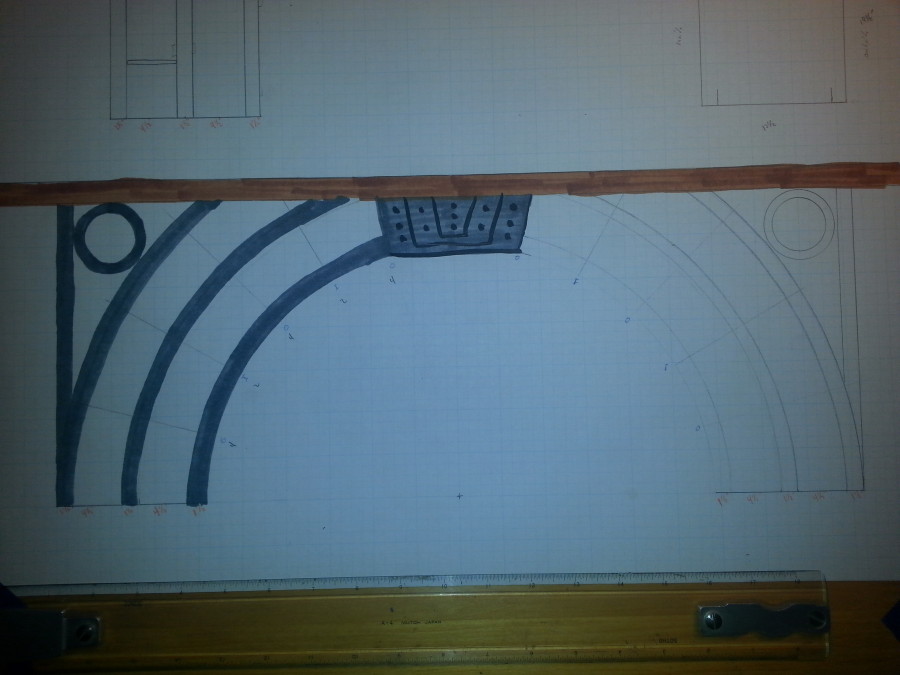
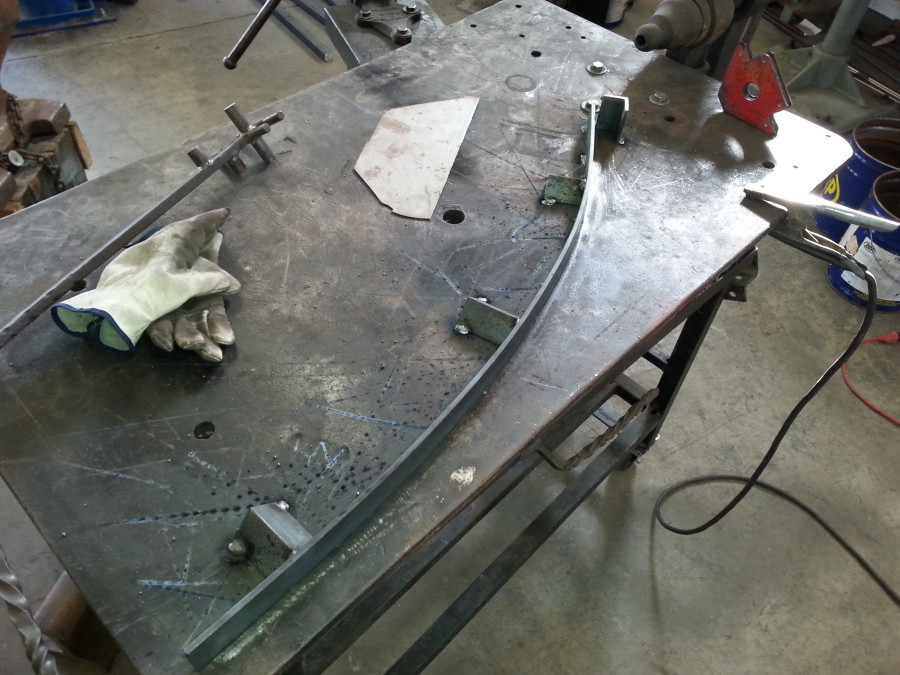
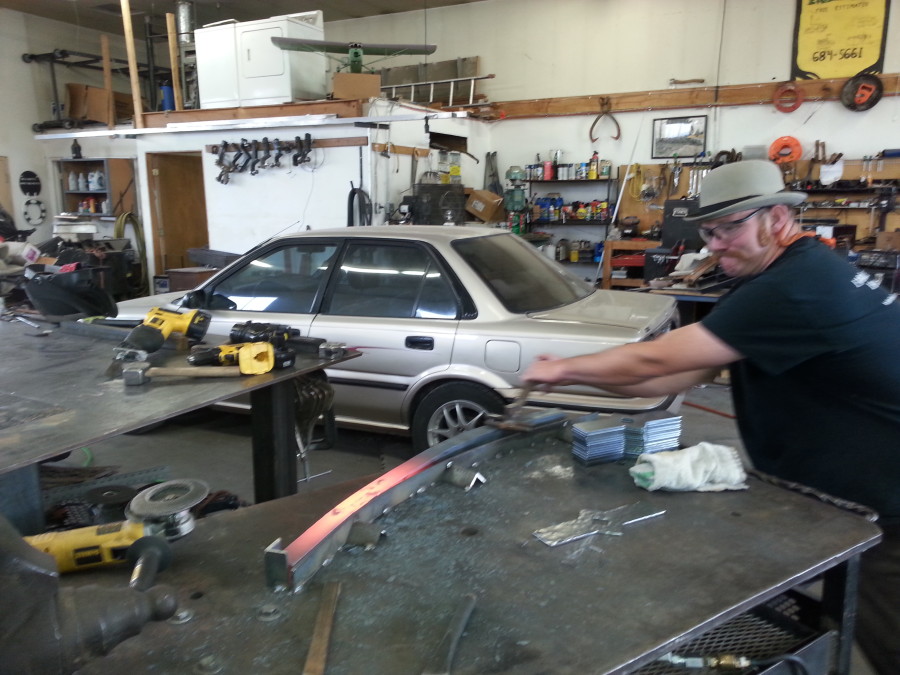
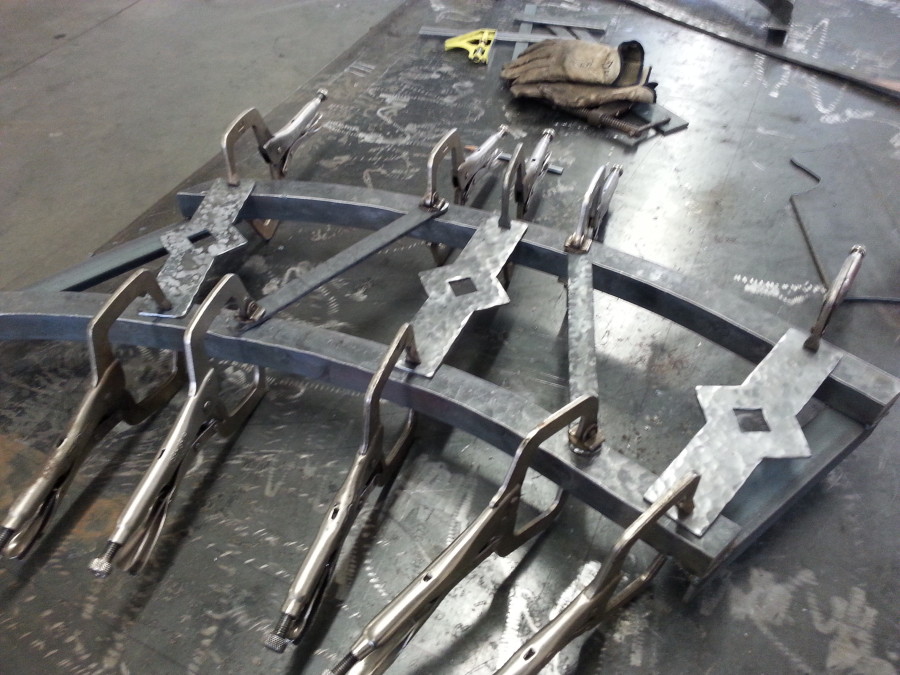
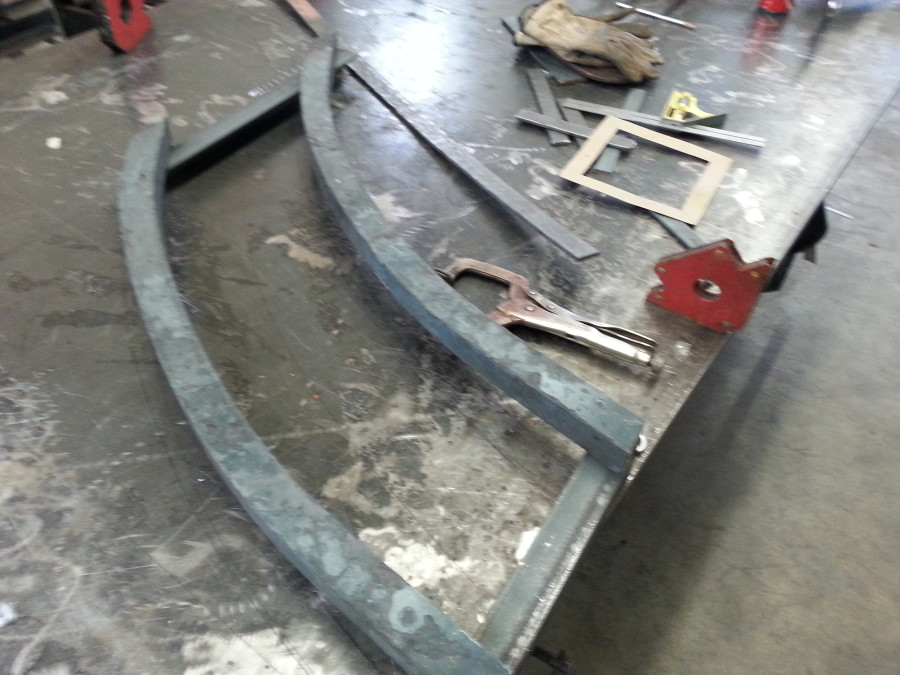
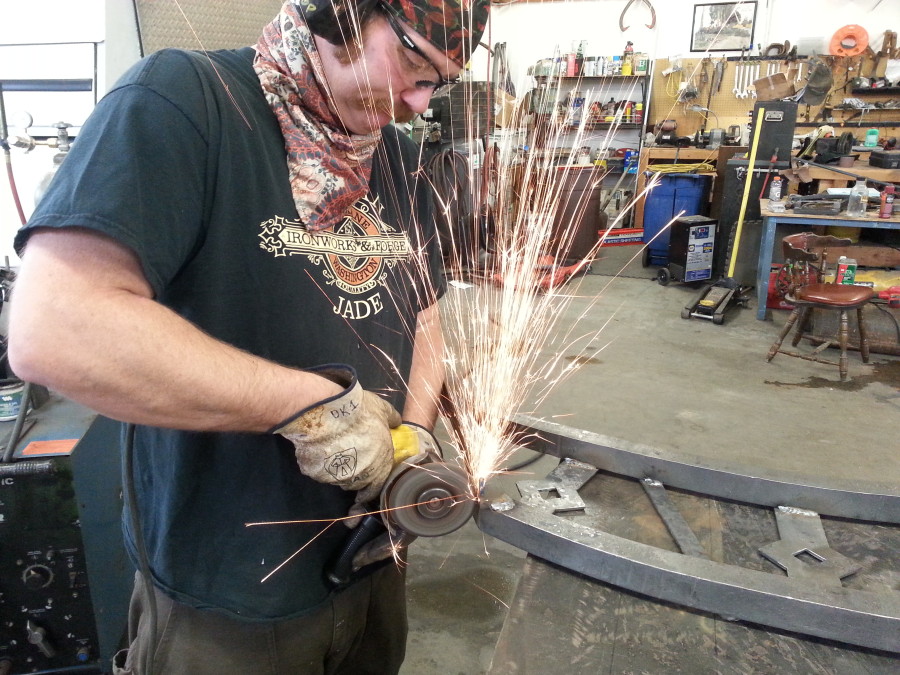
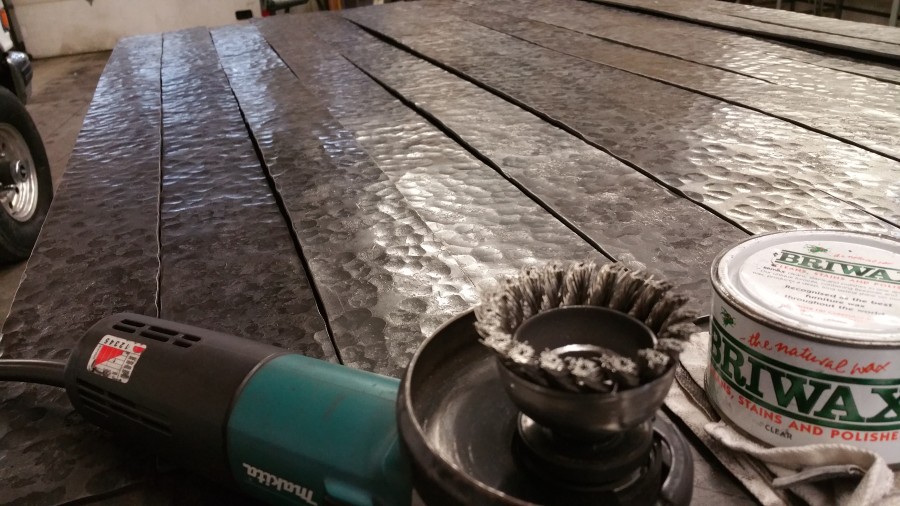
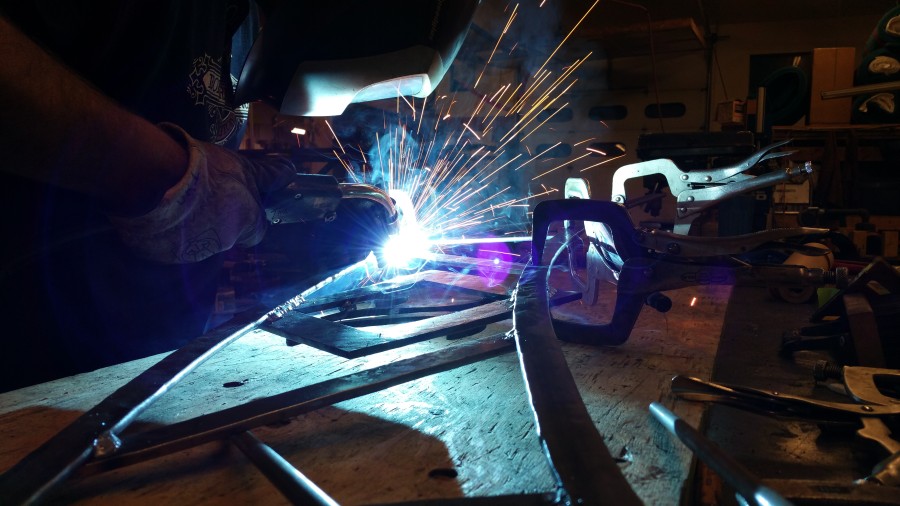
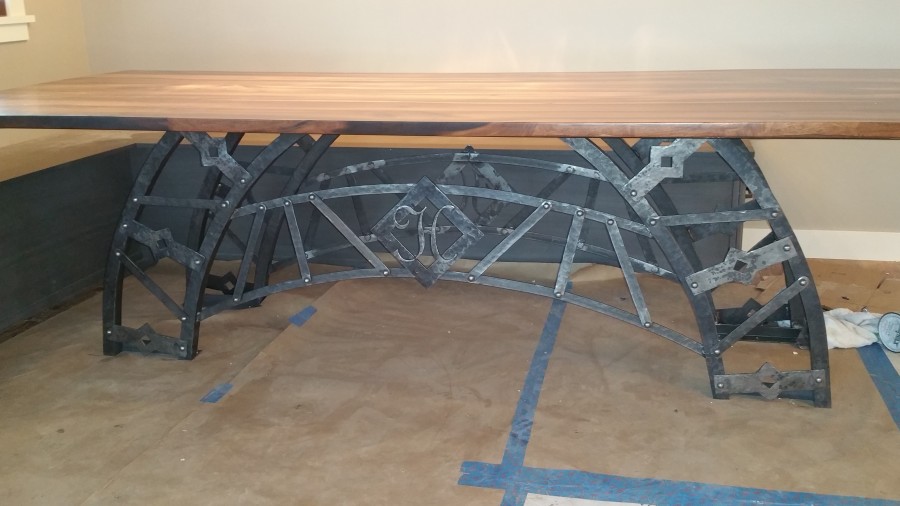
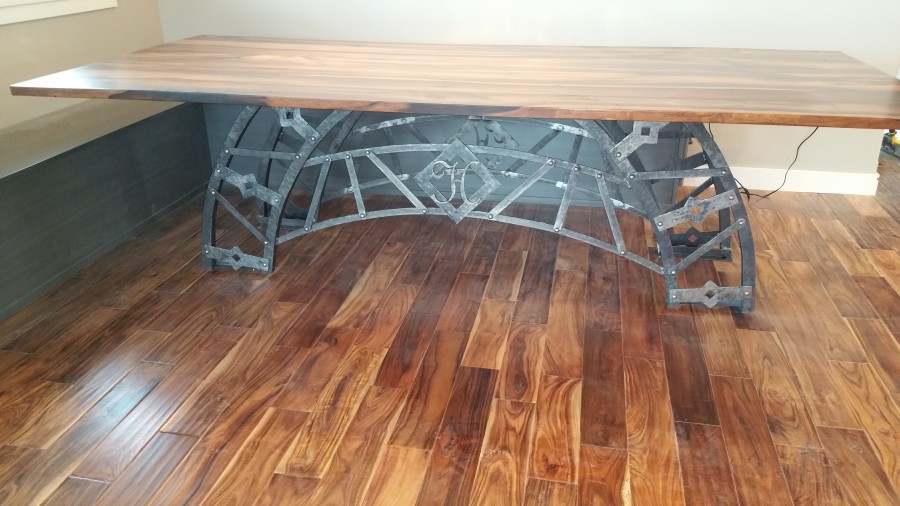
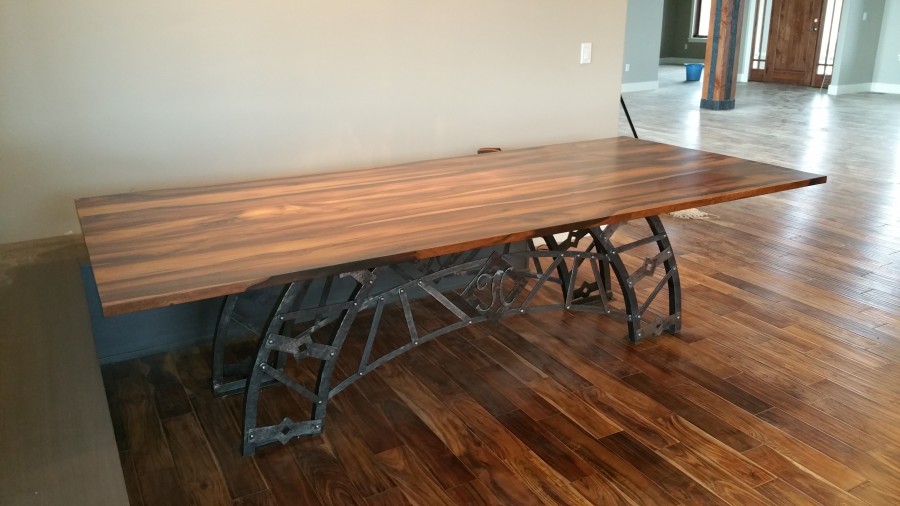
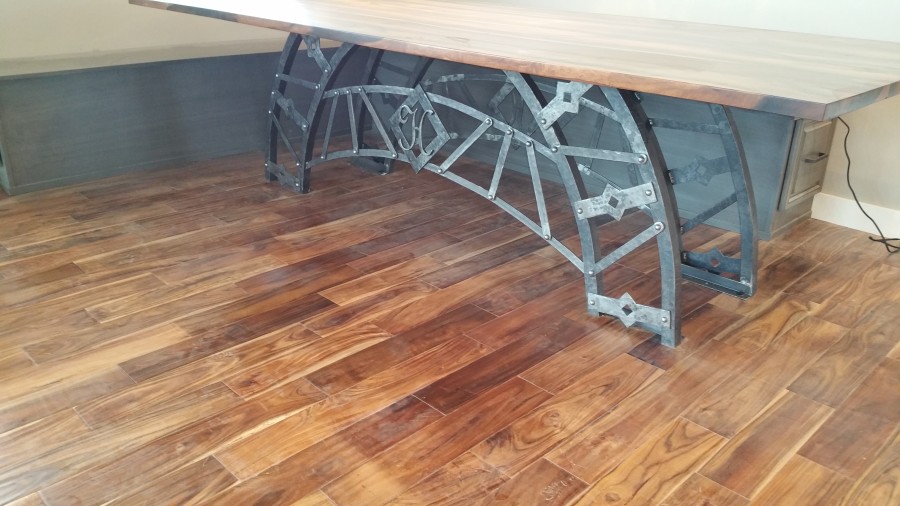
Table Base:
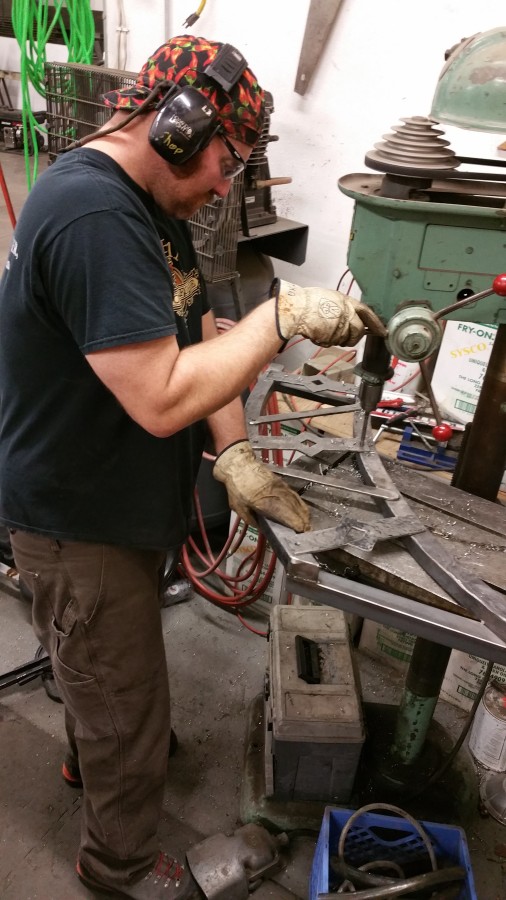
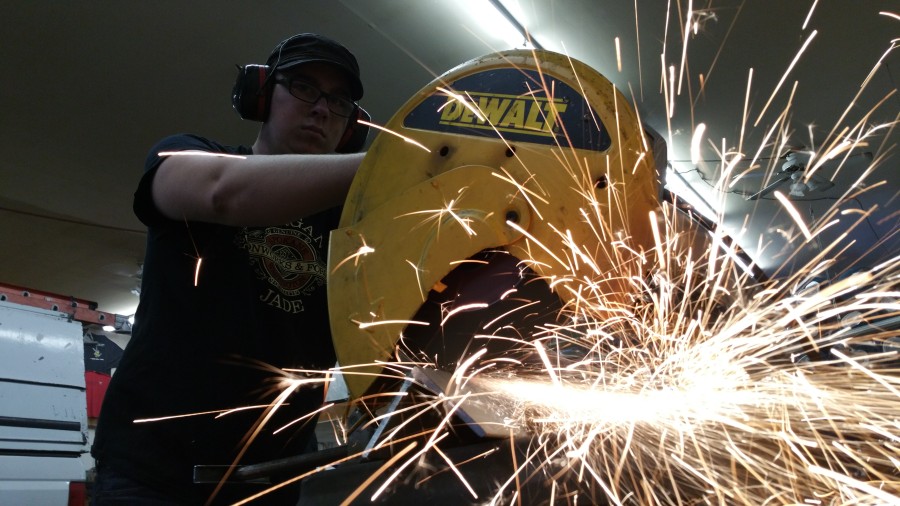
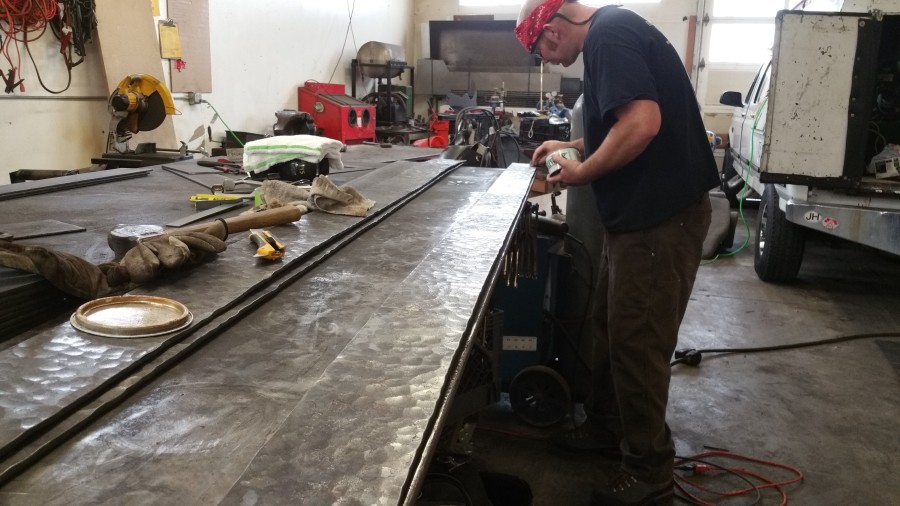
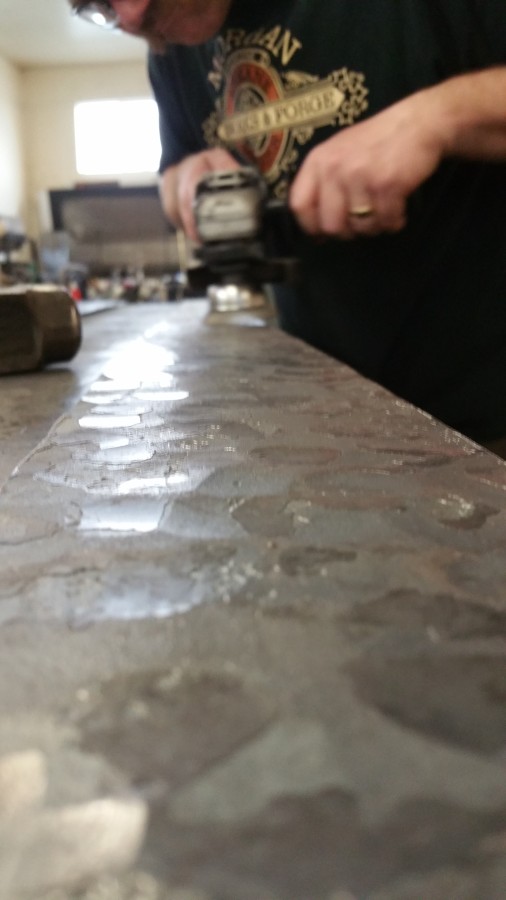
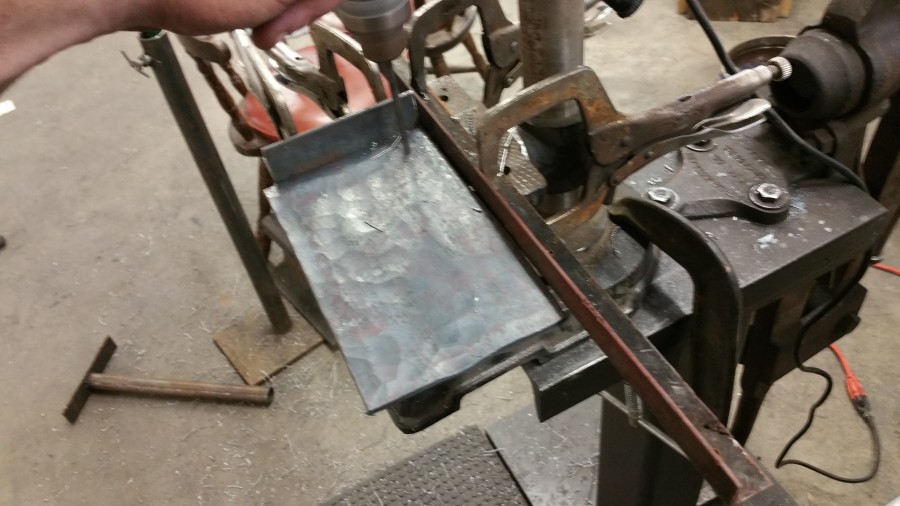
Table base is made up of bridges style truss works. Reference material was a few iron truss arch bridges in Europe. After a few drawings and adjustments the final design was agreed upon. It amazed me how what I thought would work for each part of the build turned out not to be the way it need to be in order to get the effect. After making a sample from angle iron and flat bar, it looked plain and boring. It had no feel of warmth or richness to it. I showed the sample to the customers. I suggested that a hammered texture over the entire base would look much better and I showed them some samples. Here is where I added to my work load by a lot, but I am glad I did, because the textured iron made the base. Nothing plays with your eyes the way light reflects from hot forged and hammered iron, burnished with a wire wheel and waxed up. I spectacular in my opinion!!!!! So a hammering away I went, extremely happy I had spent several thousands of dollars on a Big Blu max 110 and dies. I had textures a few hundred feet of iron by hand and it stops being fun after 3’………… 230 feet later your hoping a meteor falls from the sky and ends your misery. Lol. So any way I had some detail cross pieces cut and a center piece to go on the center of the lower arch with the First letter of their last name. I was a learning process but I am more knowledgeable, pushed myself further in the trade and am hungry for more.


Morgan Jade Ironworks: 2403 E Euclid Spokane WA 99207 | (509) 413-9727 | david@morganjadeironworks.com